


Contouring
- katherinetaber
- Feb 2, 2015
- 2 min read

Contouring


Contouring has recently become popular even though it is a far from a new technique. Most of you have been doing it without even knowing it when applying your blush and then using a lighter shade to highlight your cheekbones. That is contouring. You can take it steps further by using a lighter shade of product to show off the areas you want and using darker shades (bronzer) to recede the ones you want. It isn’t necessary to make it complicated though most tutorials make it look daunting.
Here I am going to give you the easy steps to make simple contouring a part of your quick morning routine. While working on the contouring keep two things in mind: 1. the face has a natural road map to follow. Feel your cheekbones above and below. There are dips and creases around the eye that we naturally follow when putting on eye makeup and the rest of the body is the same way. Anywhere the shape of the skull would dip is where you want to use the bronzer anywhere it would protrude (like the cheekbone). 2. Think about when you get a tan; the areas you would tan easiest (nose, cheekbones) are areas you would highlight.
(I will be using darker and more obvious shades simply for display purposes.)

1. Bronzer is always applied in the shape of “3”. Along the hairline, around to the under the cheek bone, and then sweep it down to just under the jaw bone. You can add a sweep under the chin too.

2. When adding blush you follow the shape of a “C”. Work the blush with soft circular strokes out toward the hairline. You will stay on the cheekbone. Even if the shades of the bronzer and blush don’t blend on their own, blending at the end is always a good idea
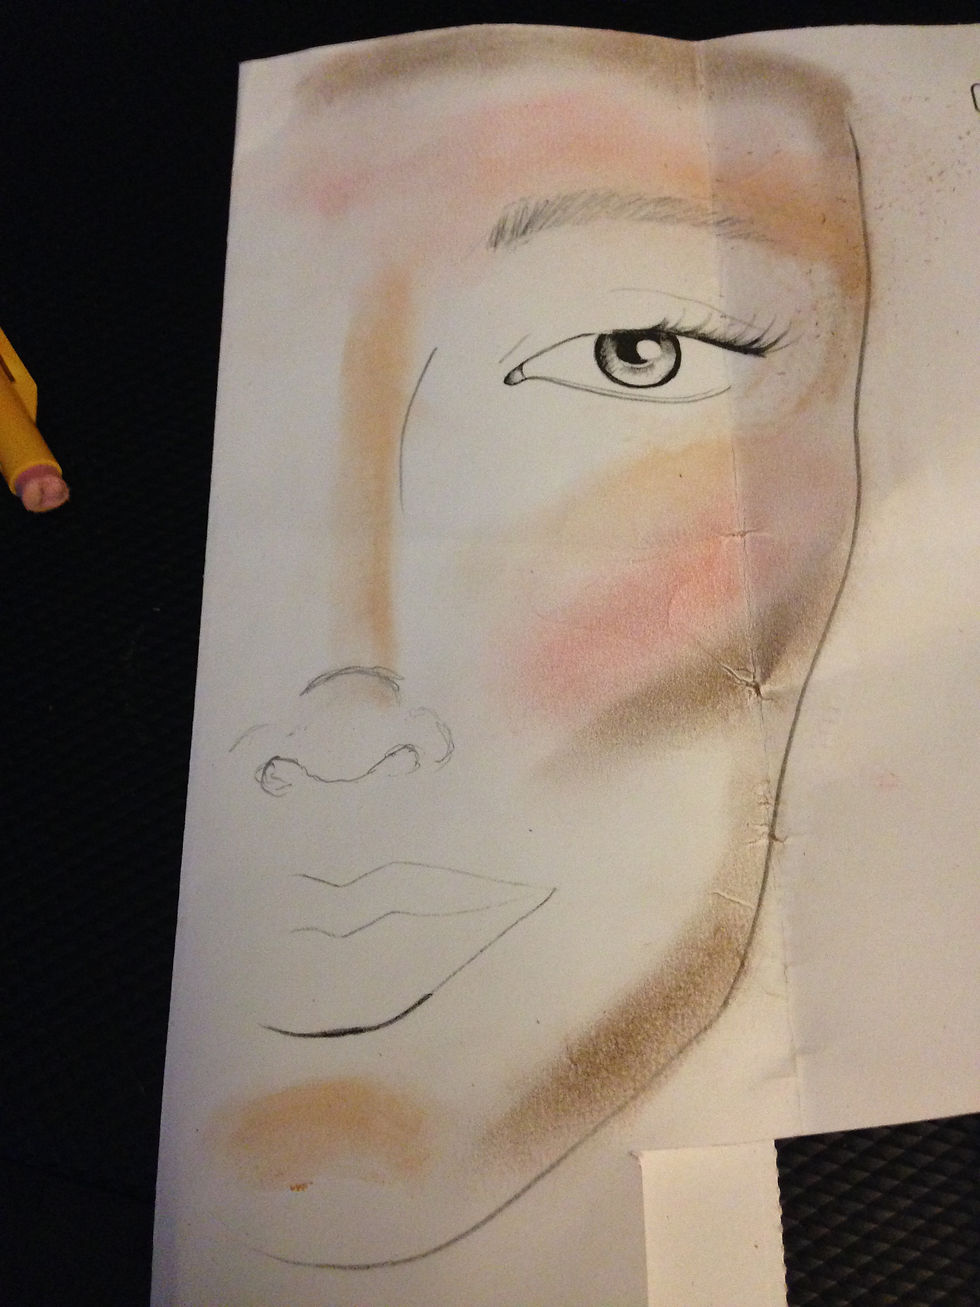
3. While doing a very basic cheekbone highlight you will utilize a “>” shape. Working from atop the brow bone, out towards the hairline then from atop mid-cheek bone out towards the hairline, meeting on right side of the orbital bone.


Comments